this Shinsengumi plan exist Nioh 3 is one of the initial side missions you can access during the game Makumatsu era. It starts with a man’s spirit mentioning that the Shinsengumi are planning something, and your main goal is to investigate the situation. That said, getting to where you want to be on this mission can be quite tricky.
Here are the details on how to complete the Shinsengumi Project Nioh 3.
“Nioh 3” Shinsengumi Plan Side Mission: Location
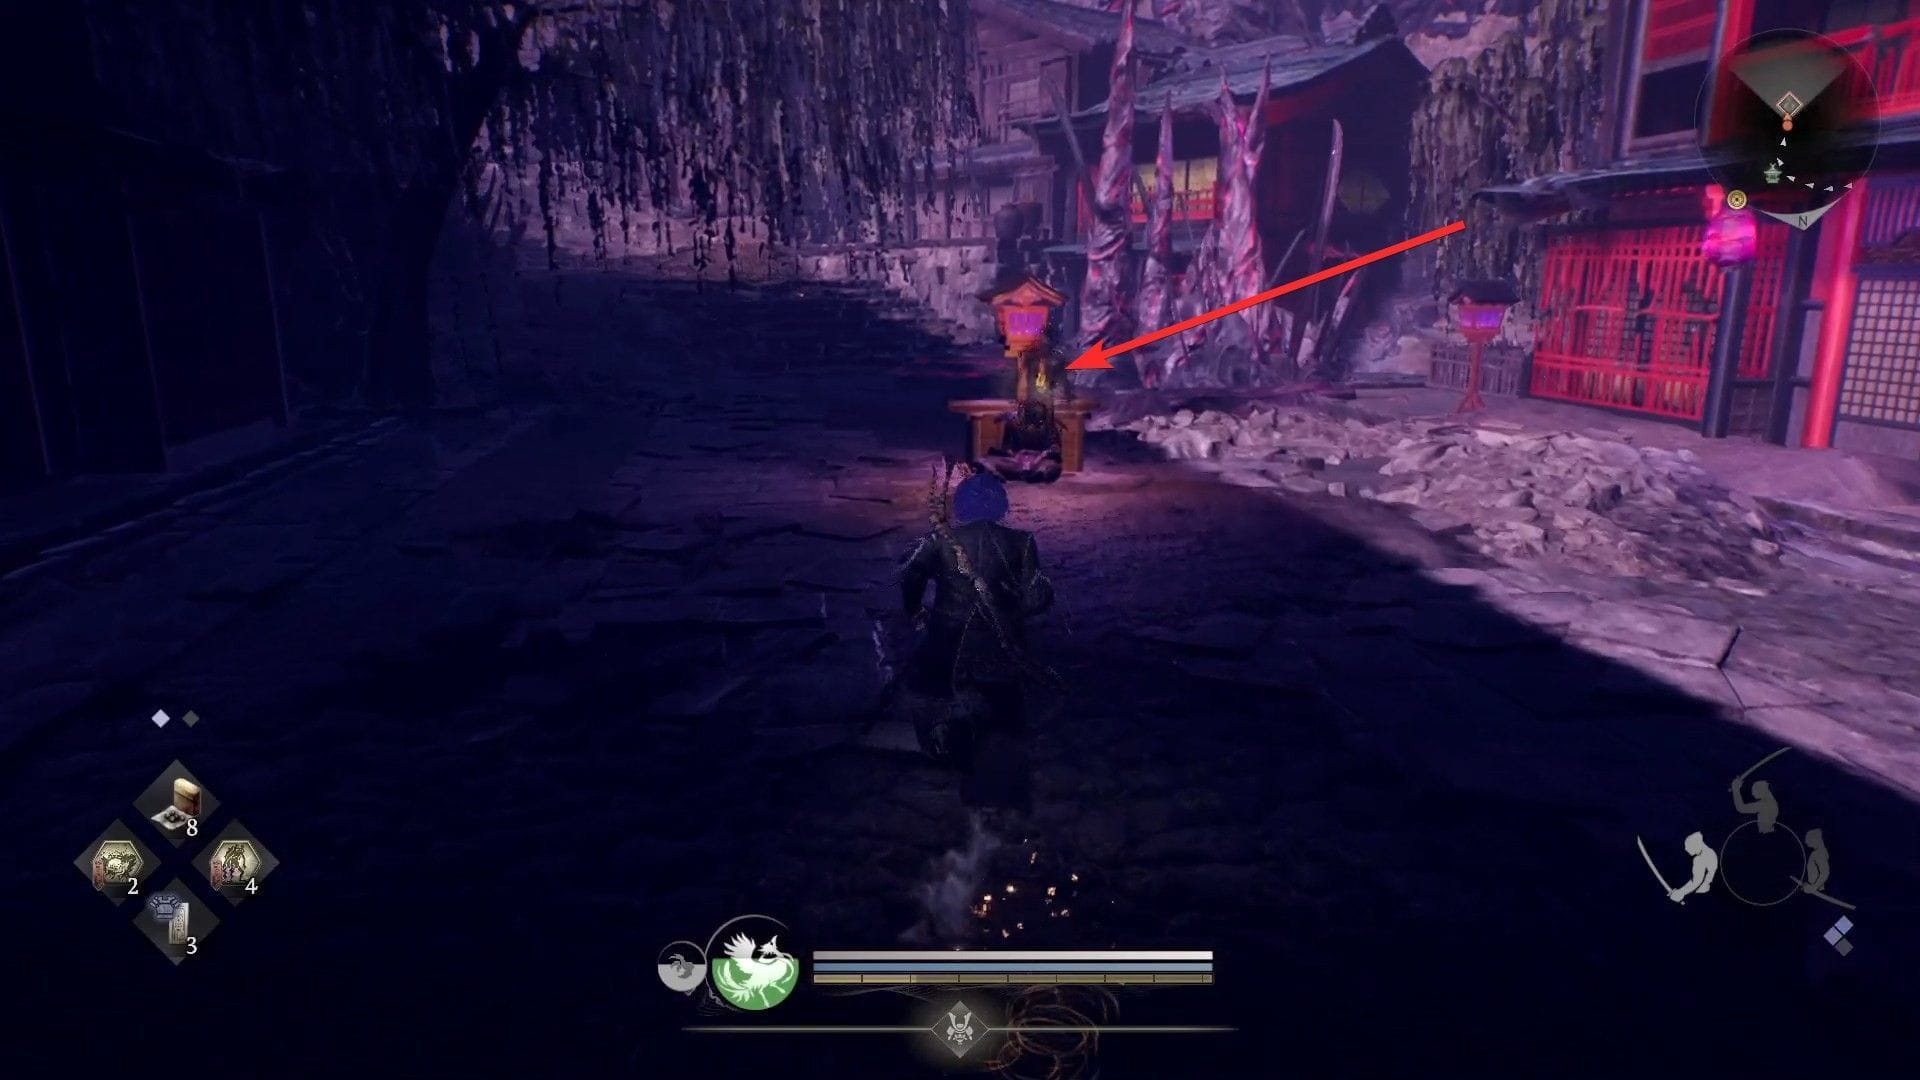
First, you must Complete the first mission of the Bakumatsu Era, Main tasks in the new eraand finally defeated Takasugi Shinsaku. From the boss battle location, continue forward to enter Shimabara Recreation Area – Main Entrance shrine.
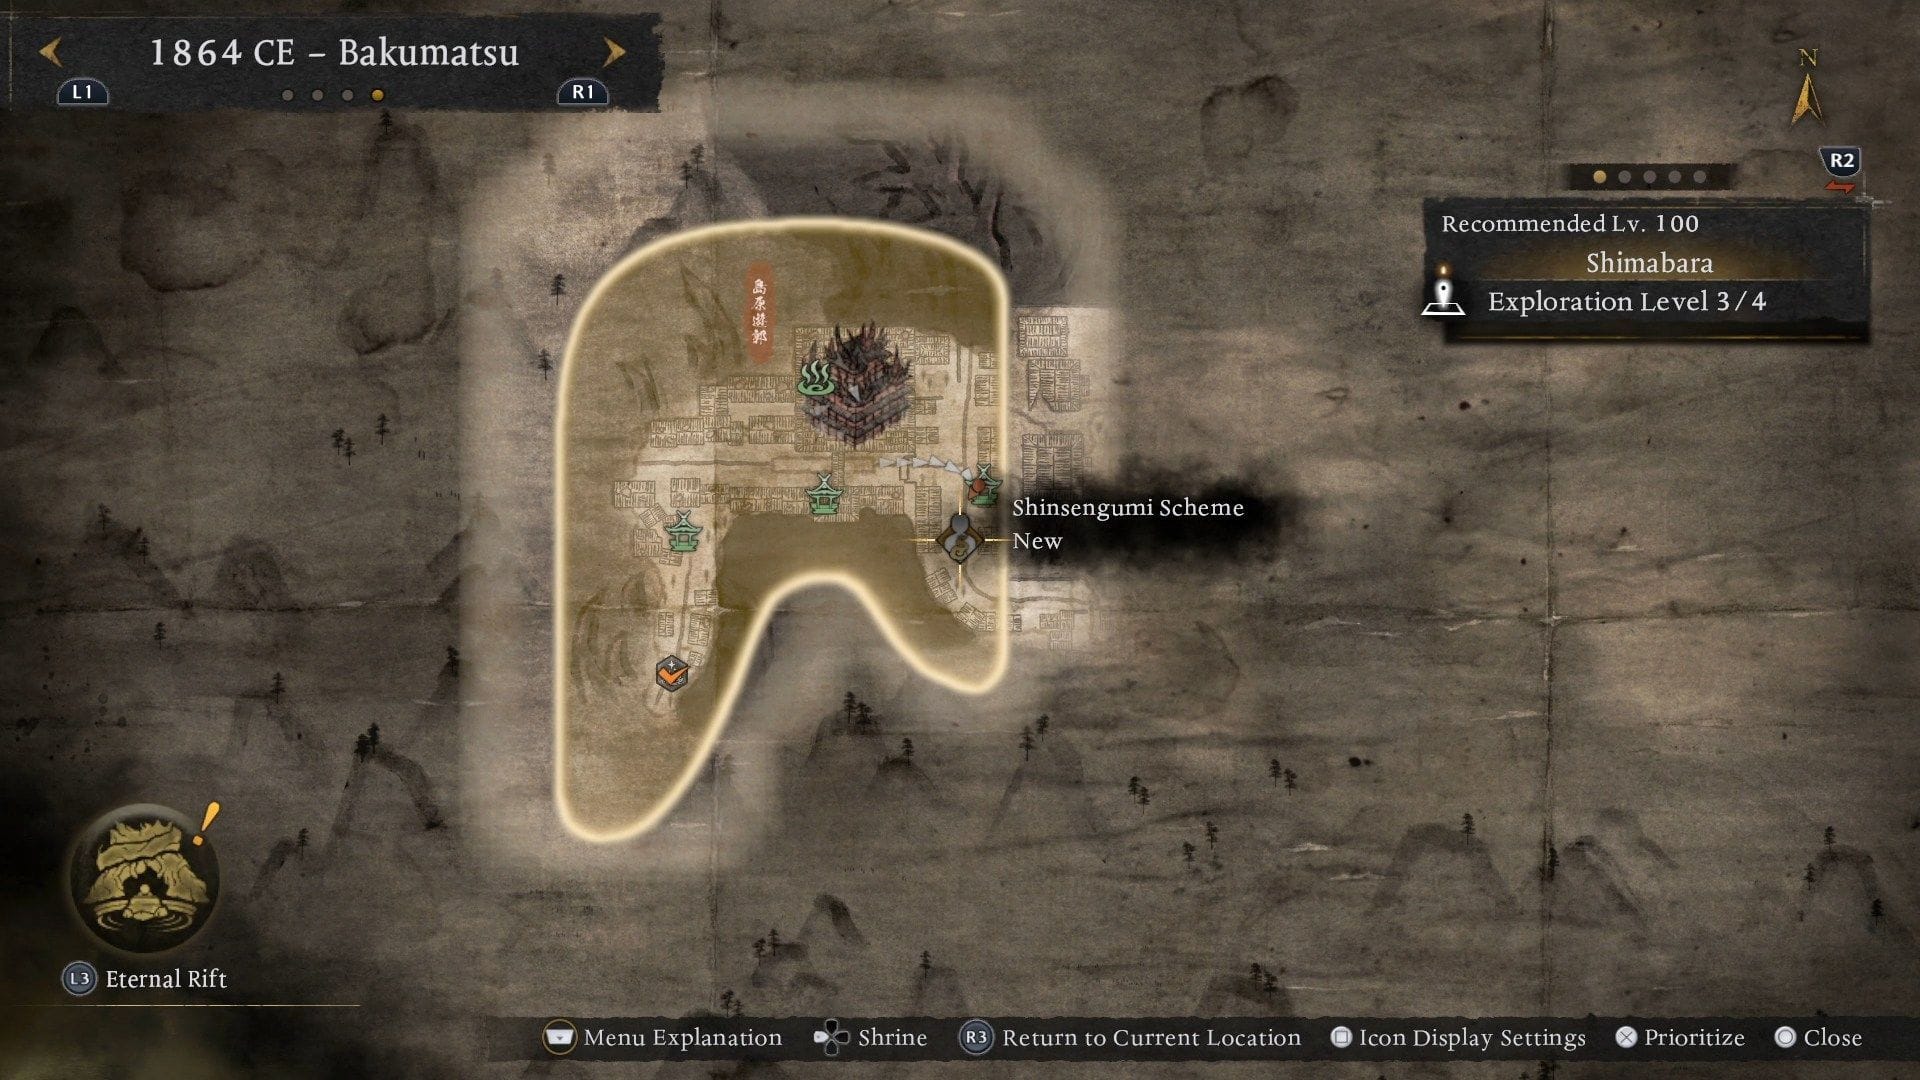
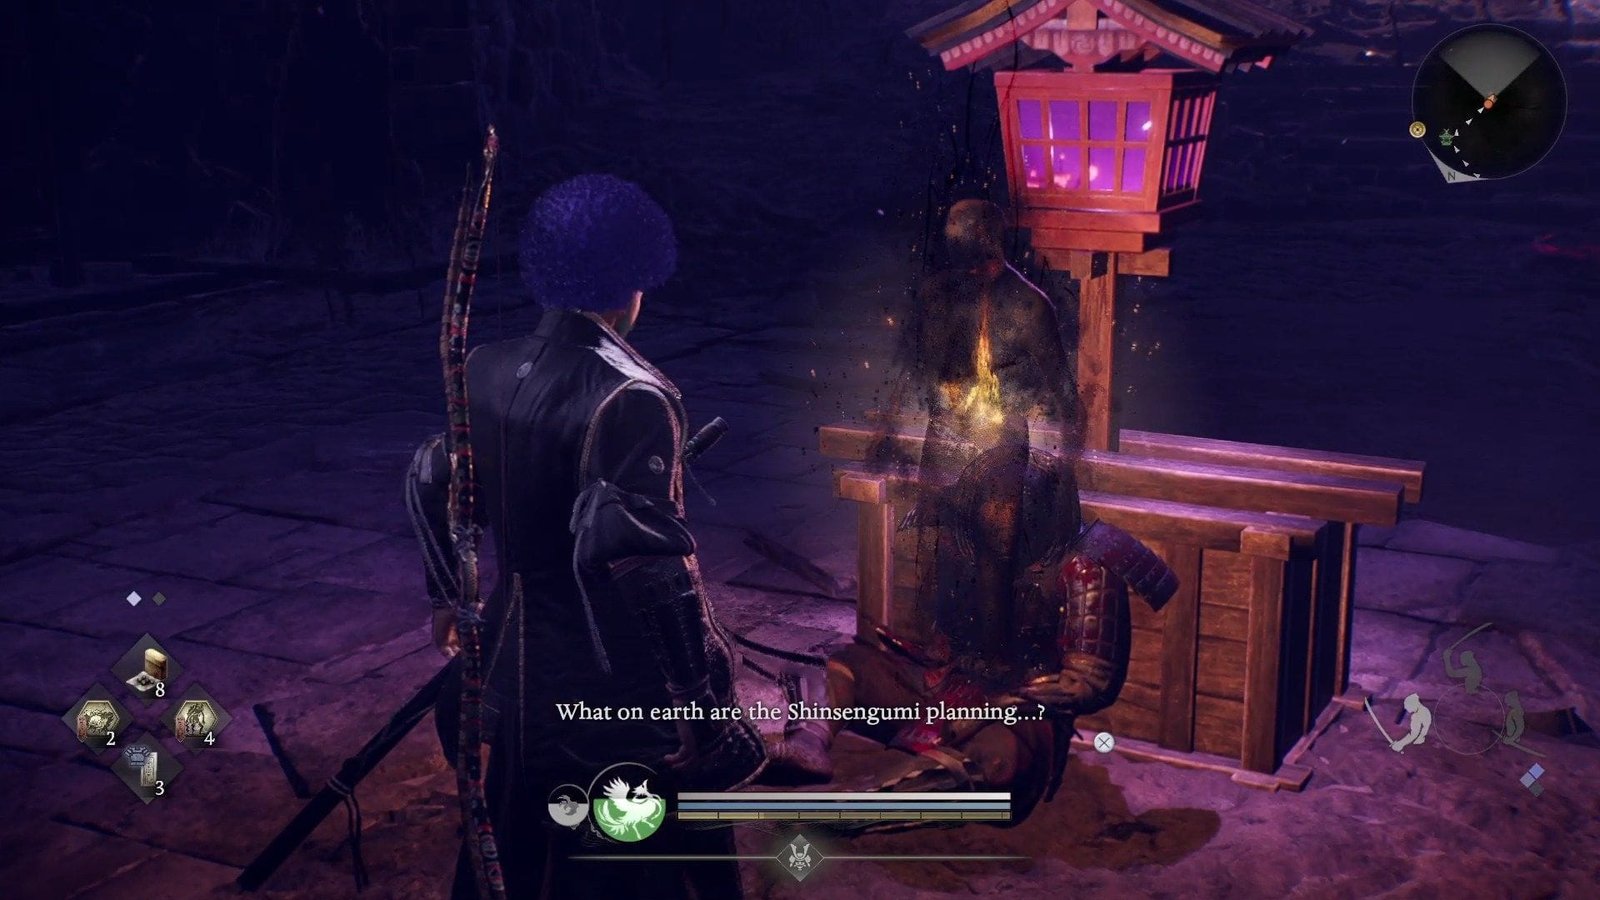
Then drive south for a while until you encounter a human soul permanent exist before red light. talk to him Start the Shinsengumi Project side mission in Nioh 3.
Also read: All main missions and side missions in “Nioh 3”
The Shinsengumi Project side mission in “Nioh 3: Walkthrough”
Chasing the Seven Shinsengumi
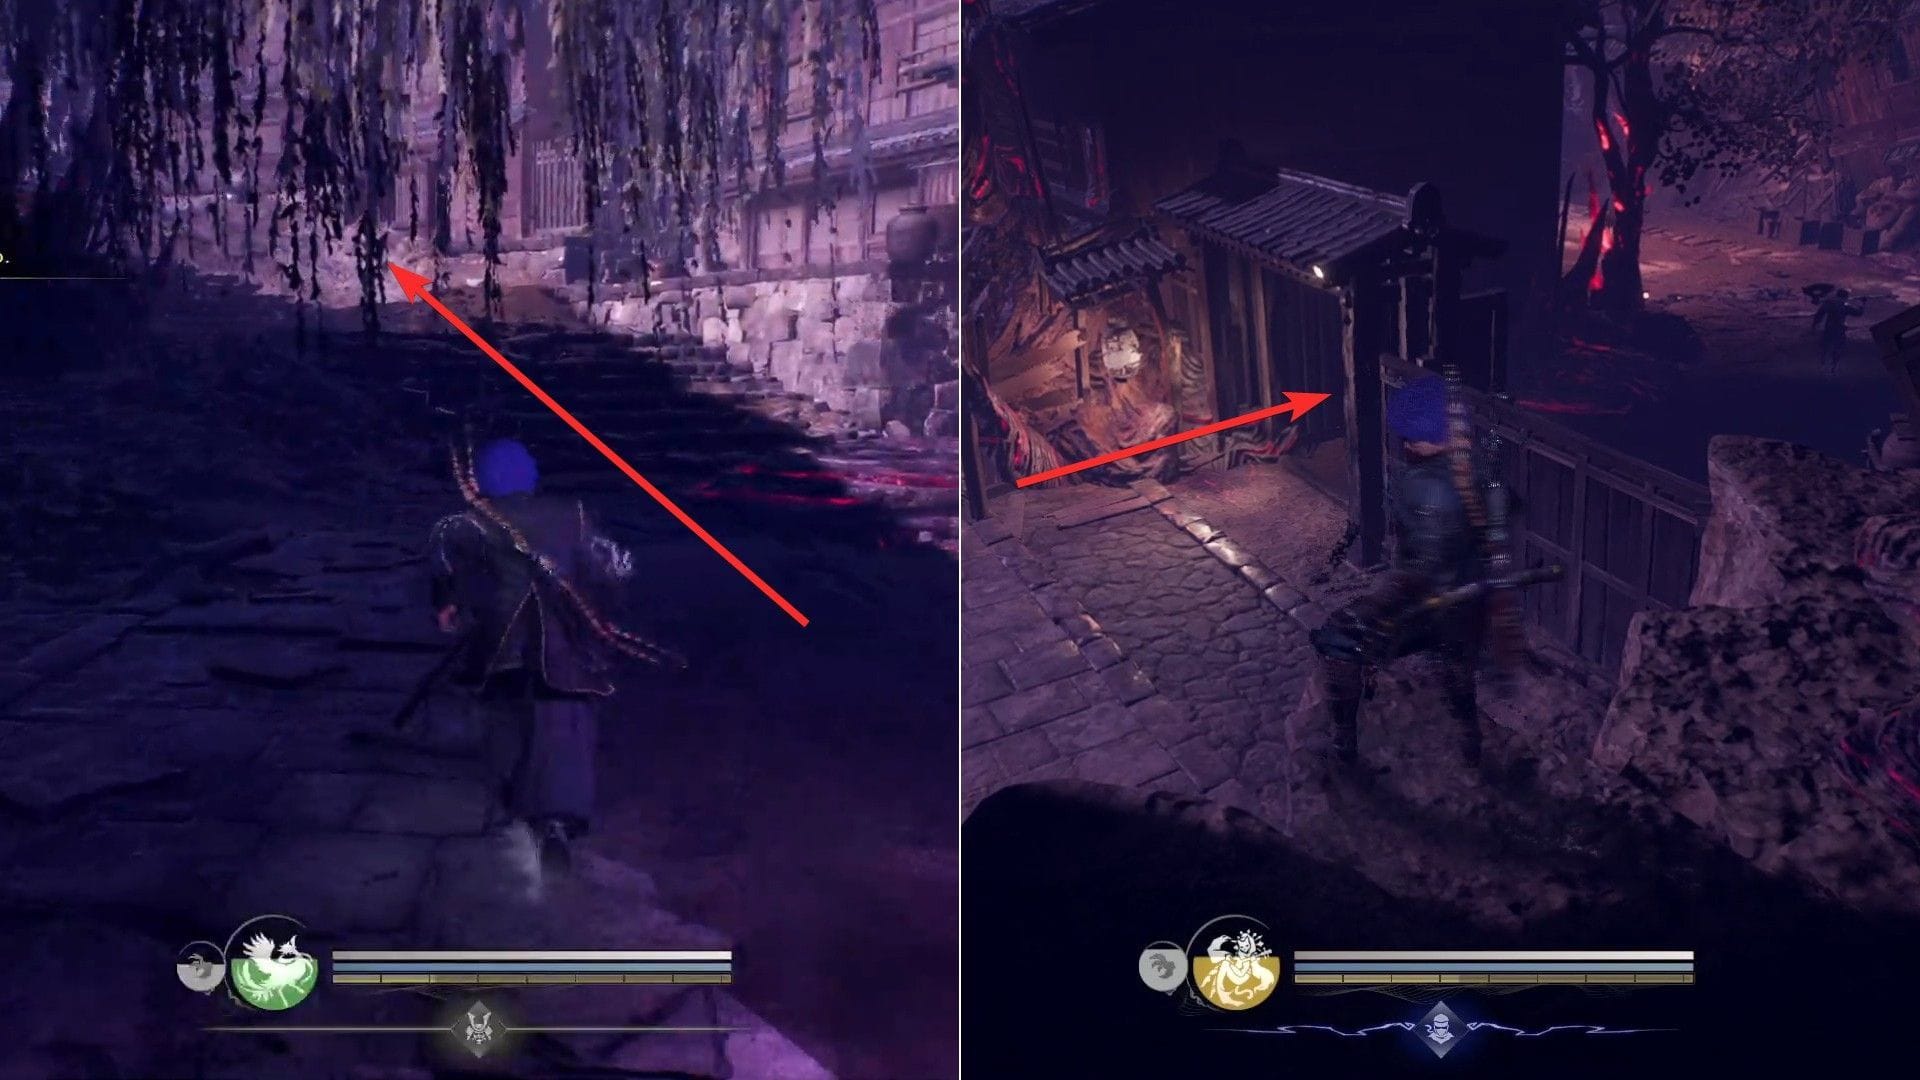
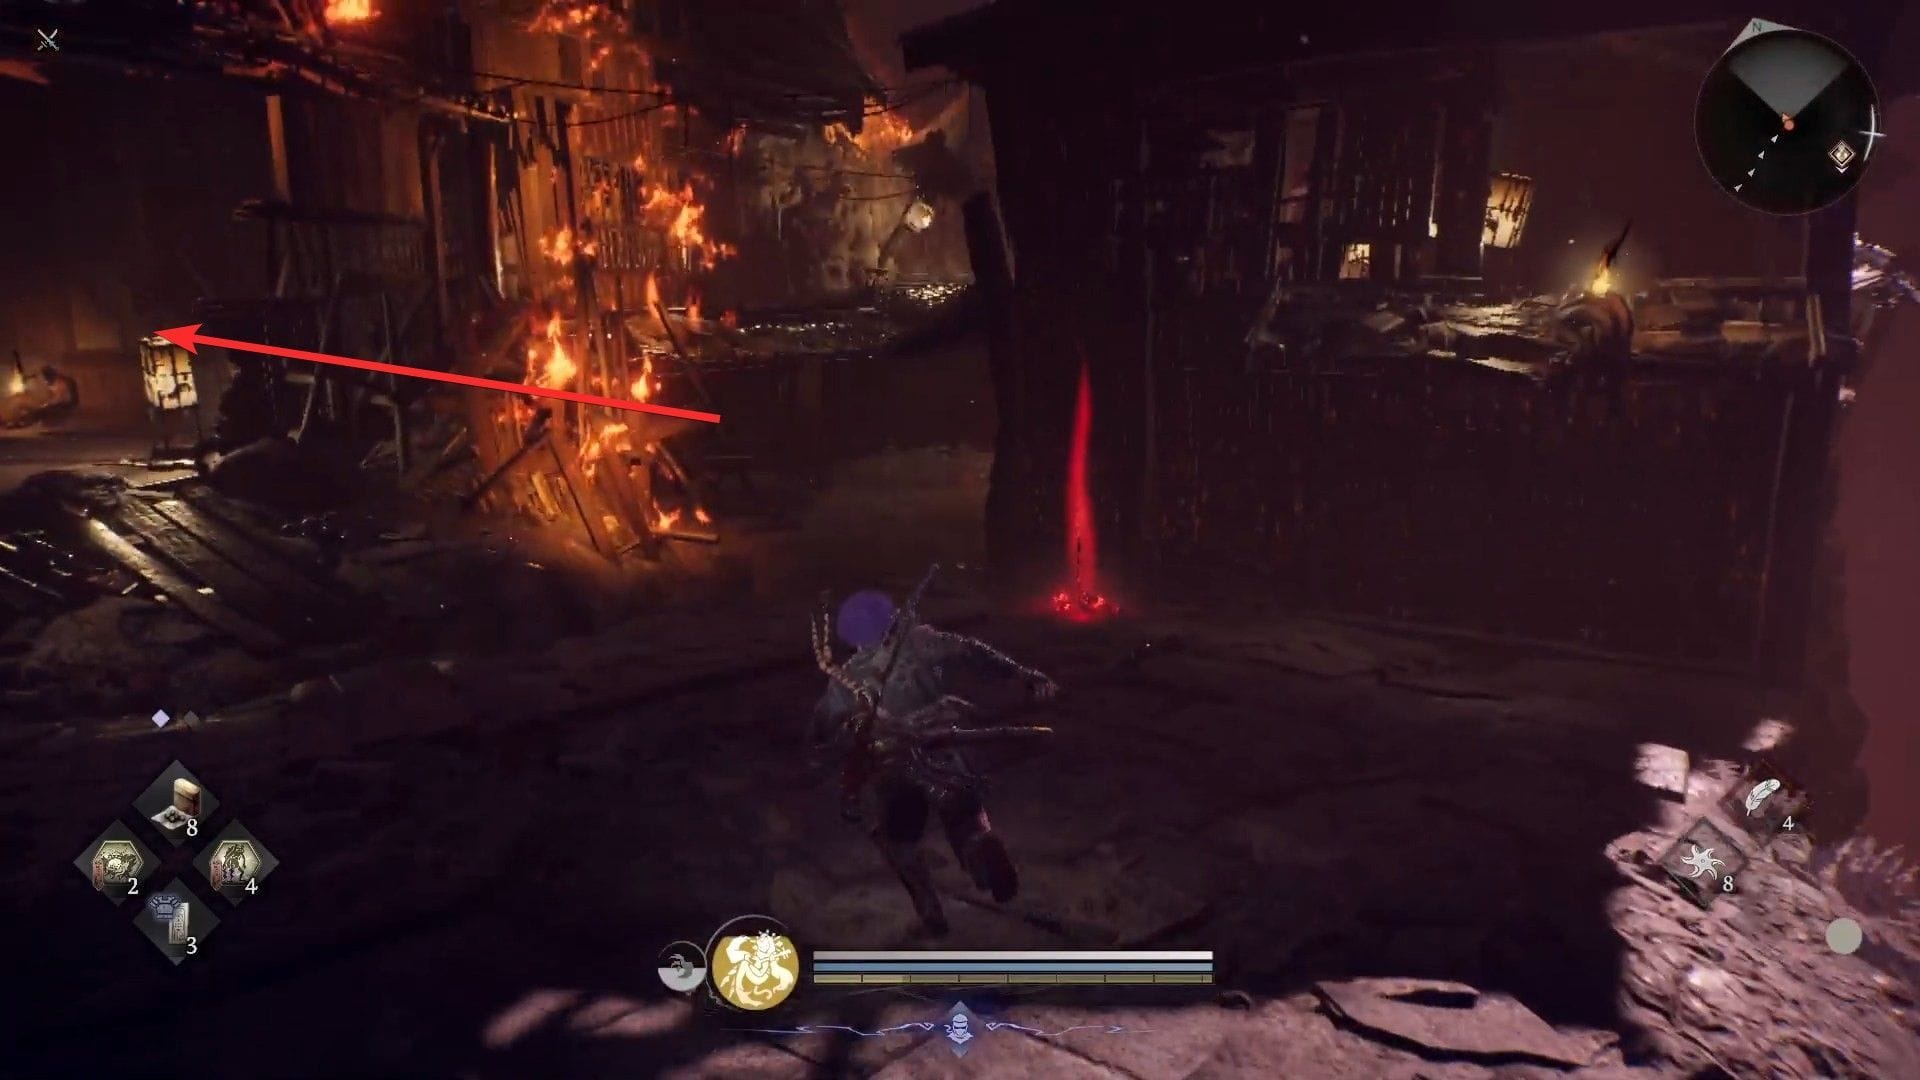
Starting from the starting position of the task, Follow the path to the southdefeat the enemy, at the end of the road, Turn right.
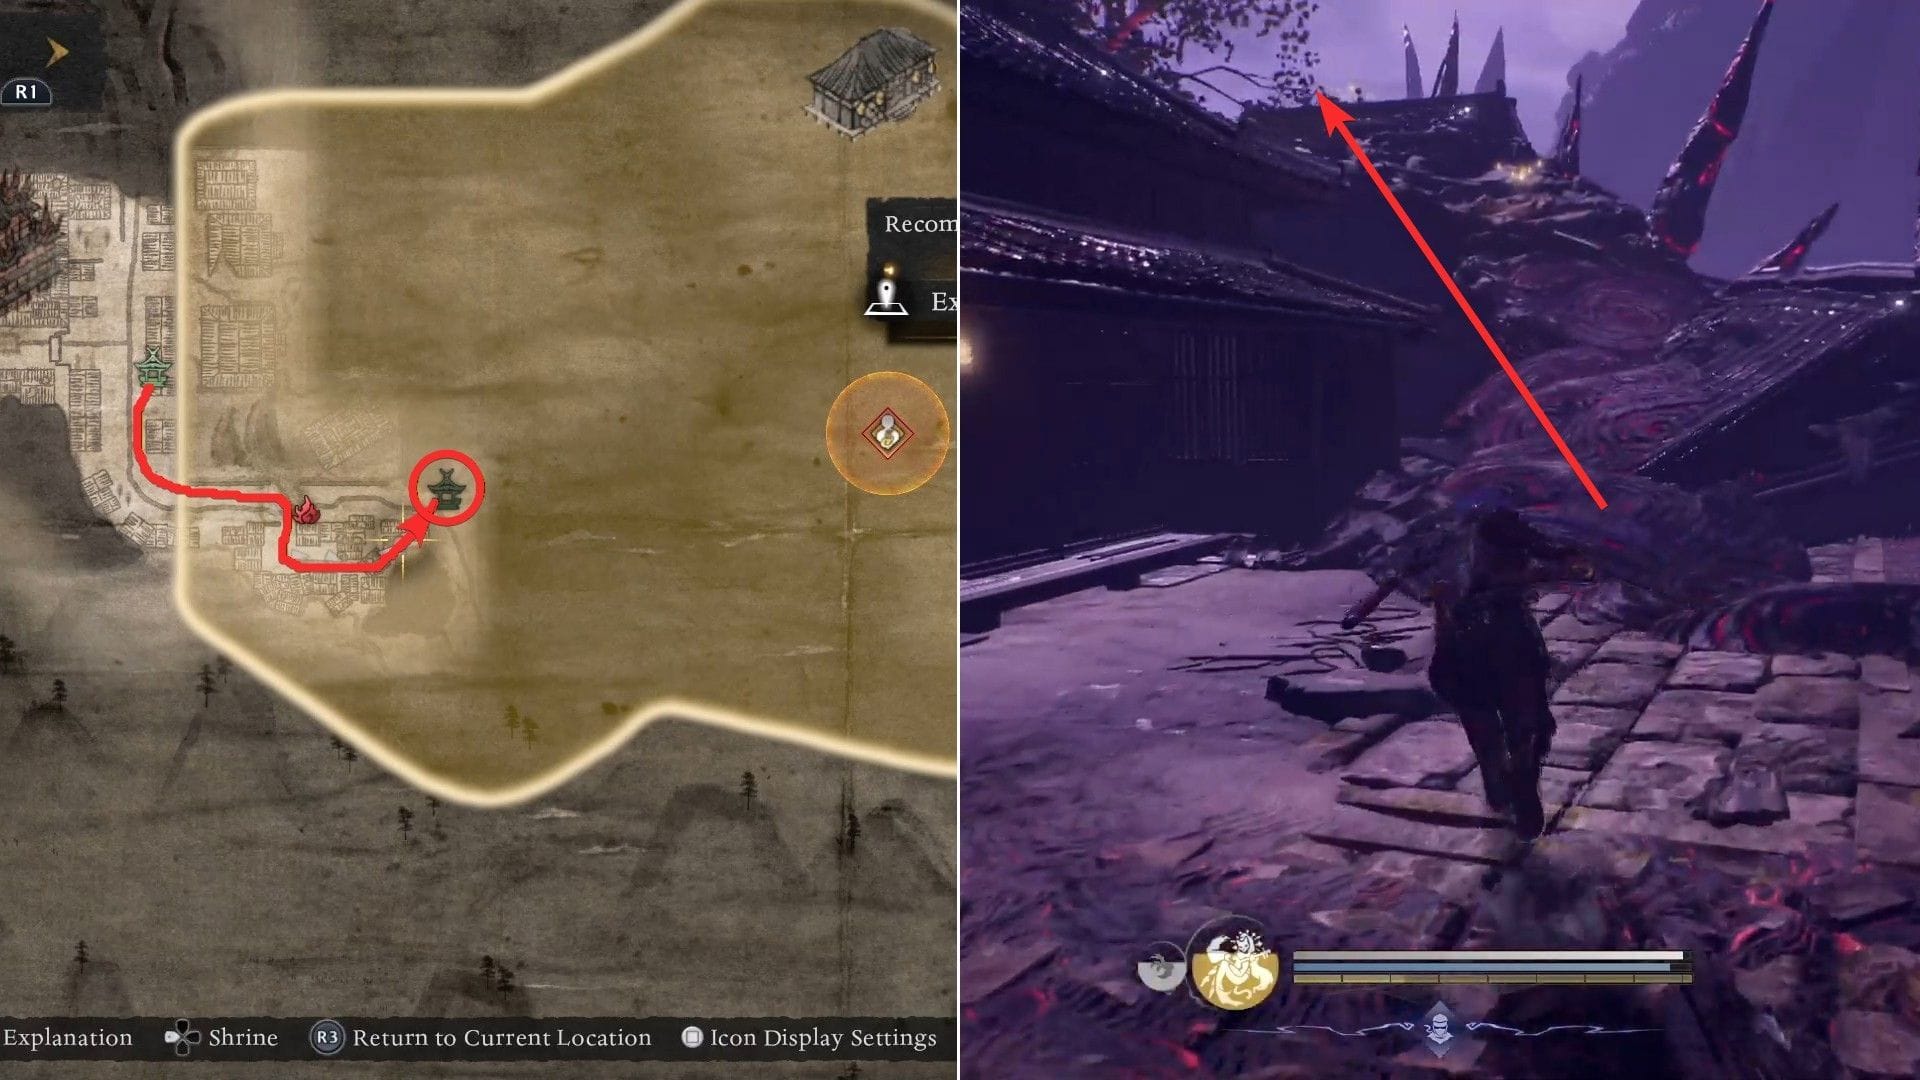
After taking care of the enemies there, Use the roof to go east Arrive at the next shrine, Ruins of Seven AvenuesShichijo area.

Now, Continue walking northeast Start a boss fight Shinsengumi member Takeo Hattori.
If you have the Living Artifact, use it to finish him off quickly. Otherwise, you can only rely on patron saint Or the soul core ability to take down the boss. This battle should be relatively easier than the ones you encounter in earlier missions in the story.
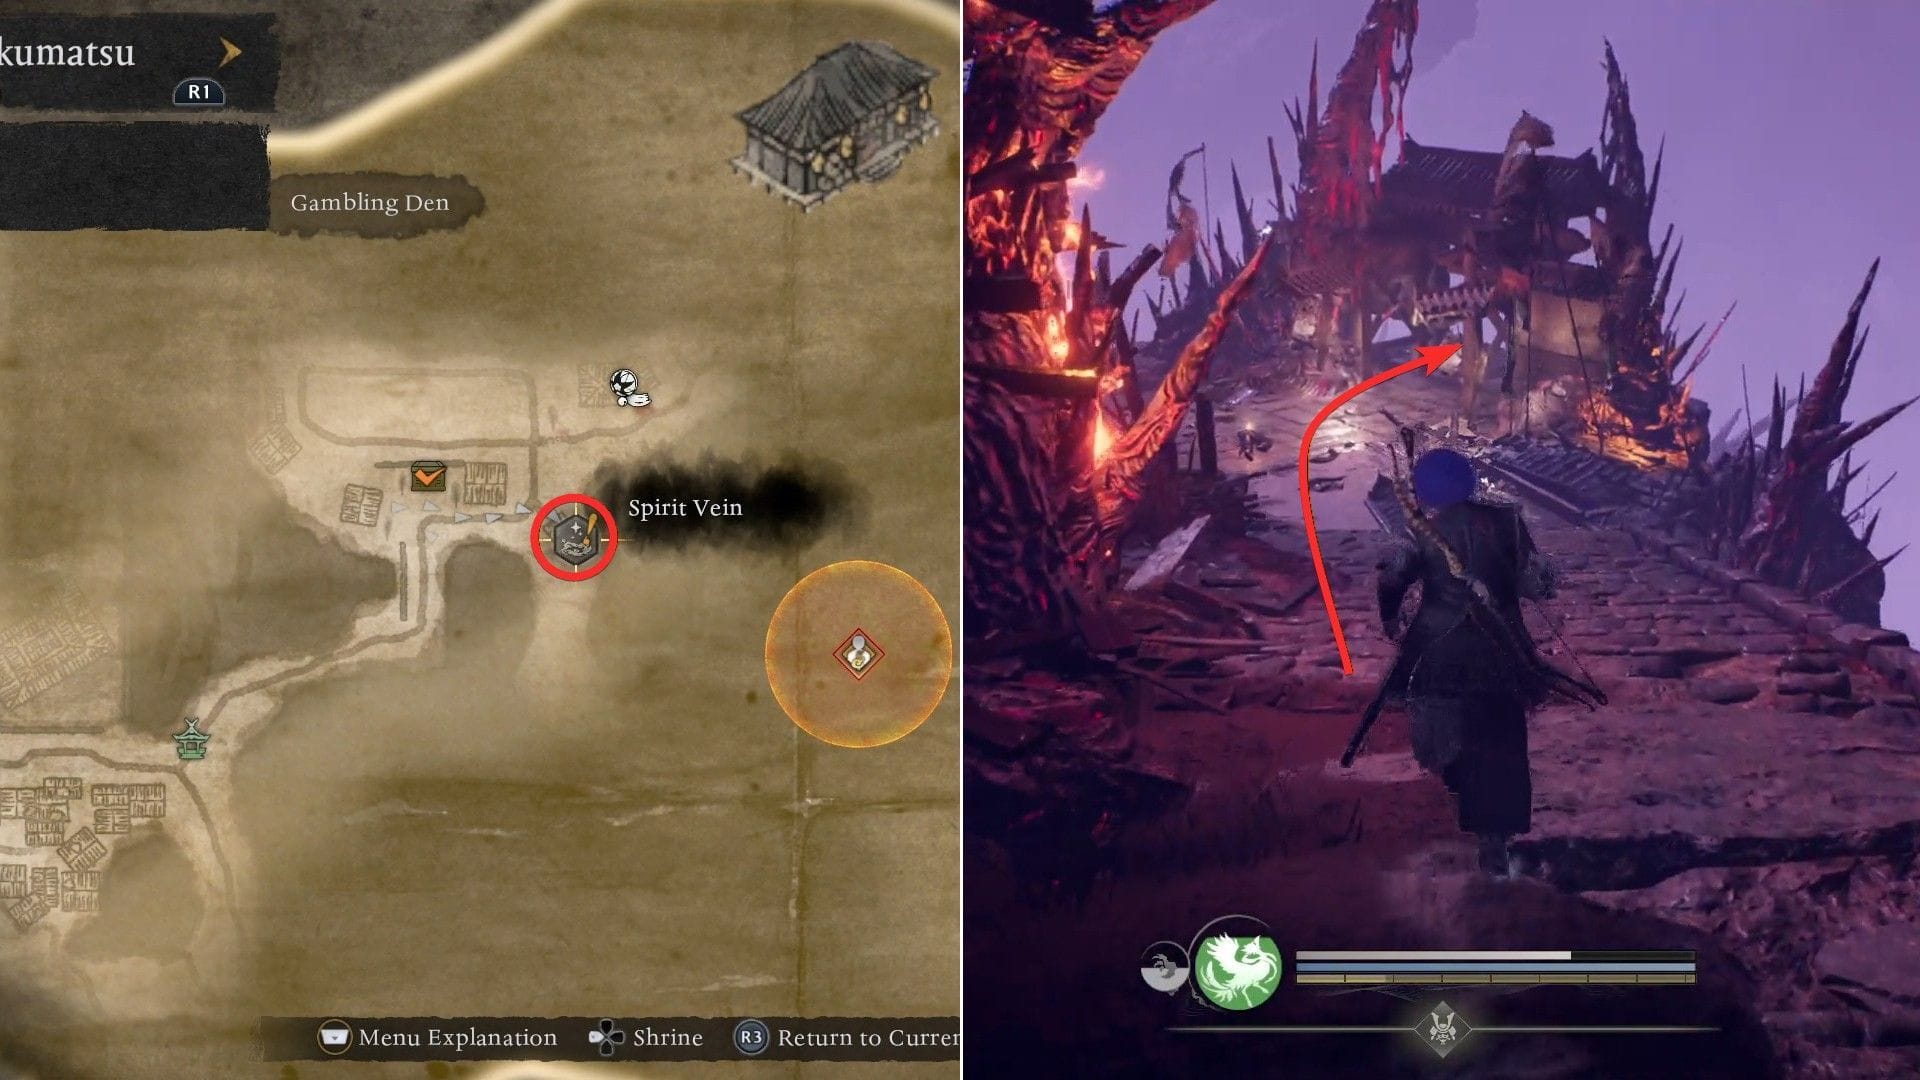
When Shinsengumi member Hattori Takeo was defeated, go east for a while and Go right and find a spiritual veins There. Use it to reach lower parts location.
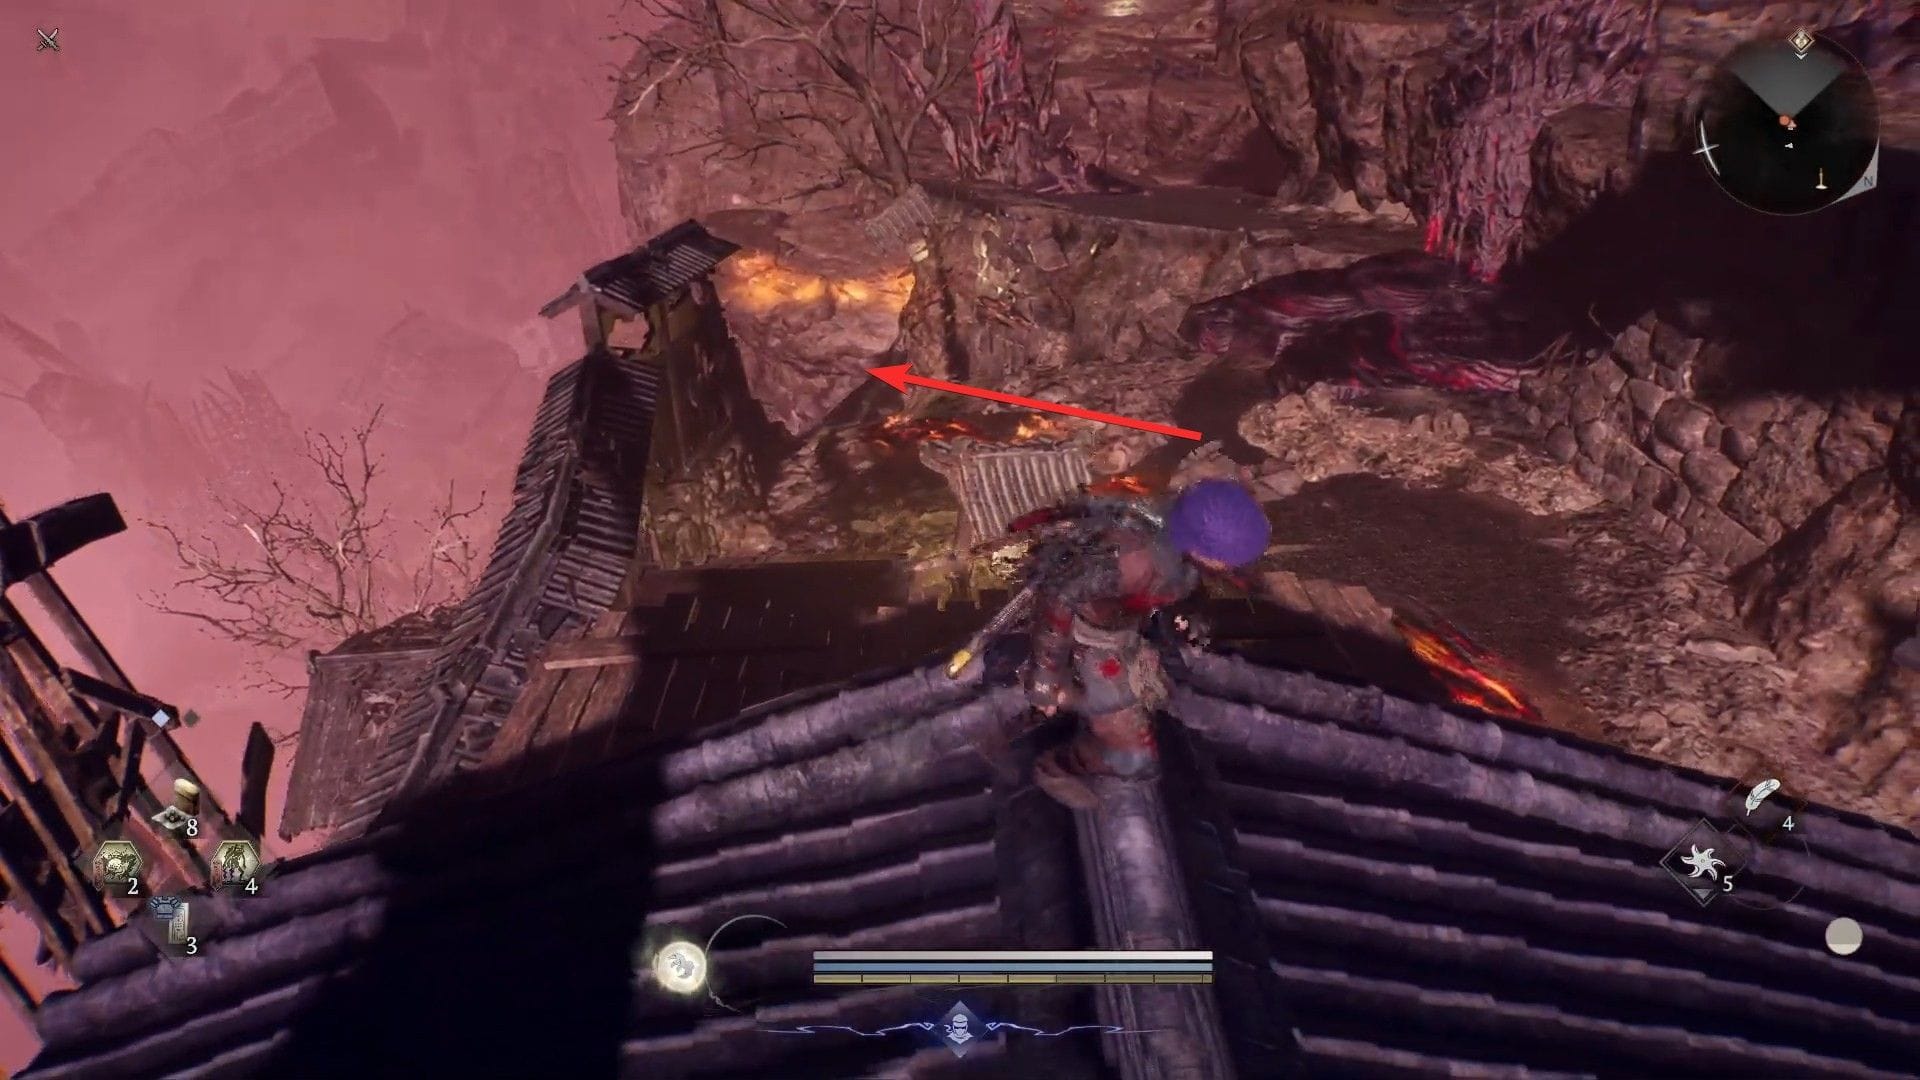
Next, continue south reach another shrine, Seven Abyss-Strata.
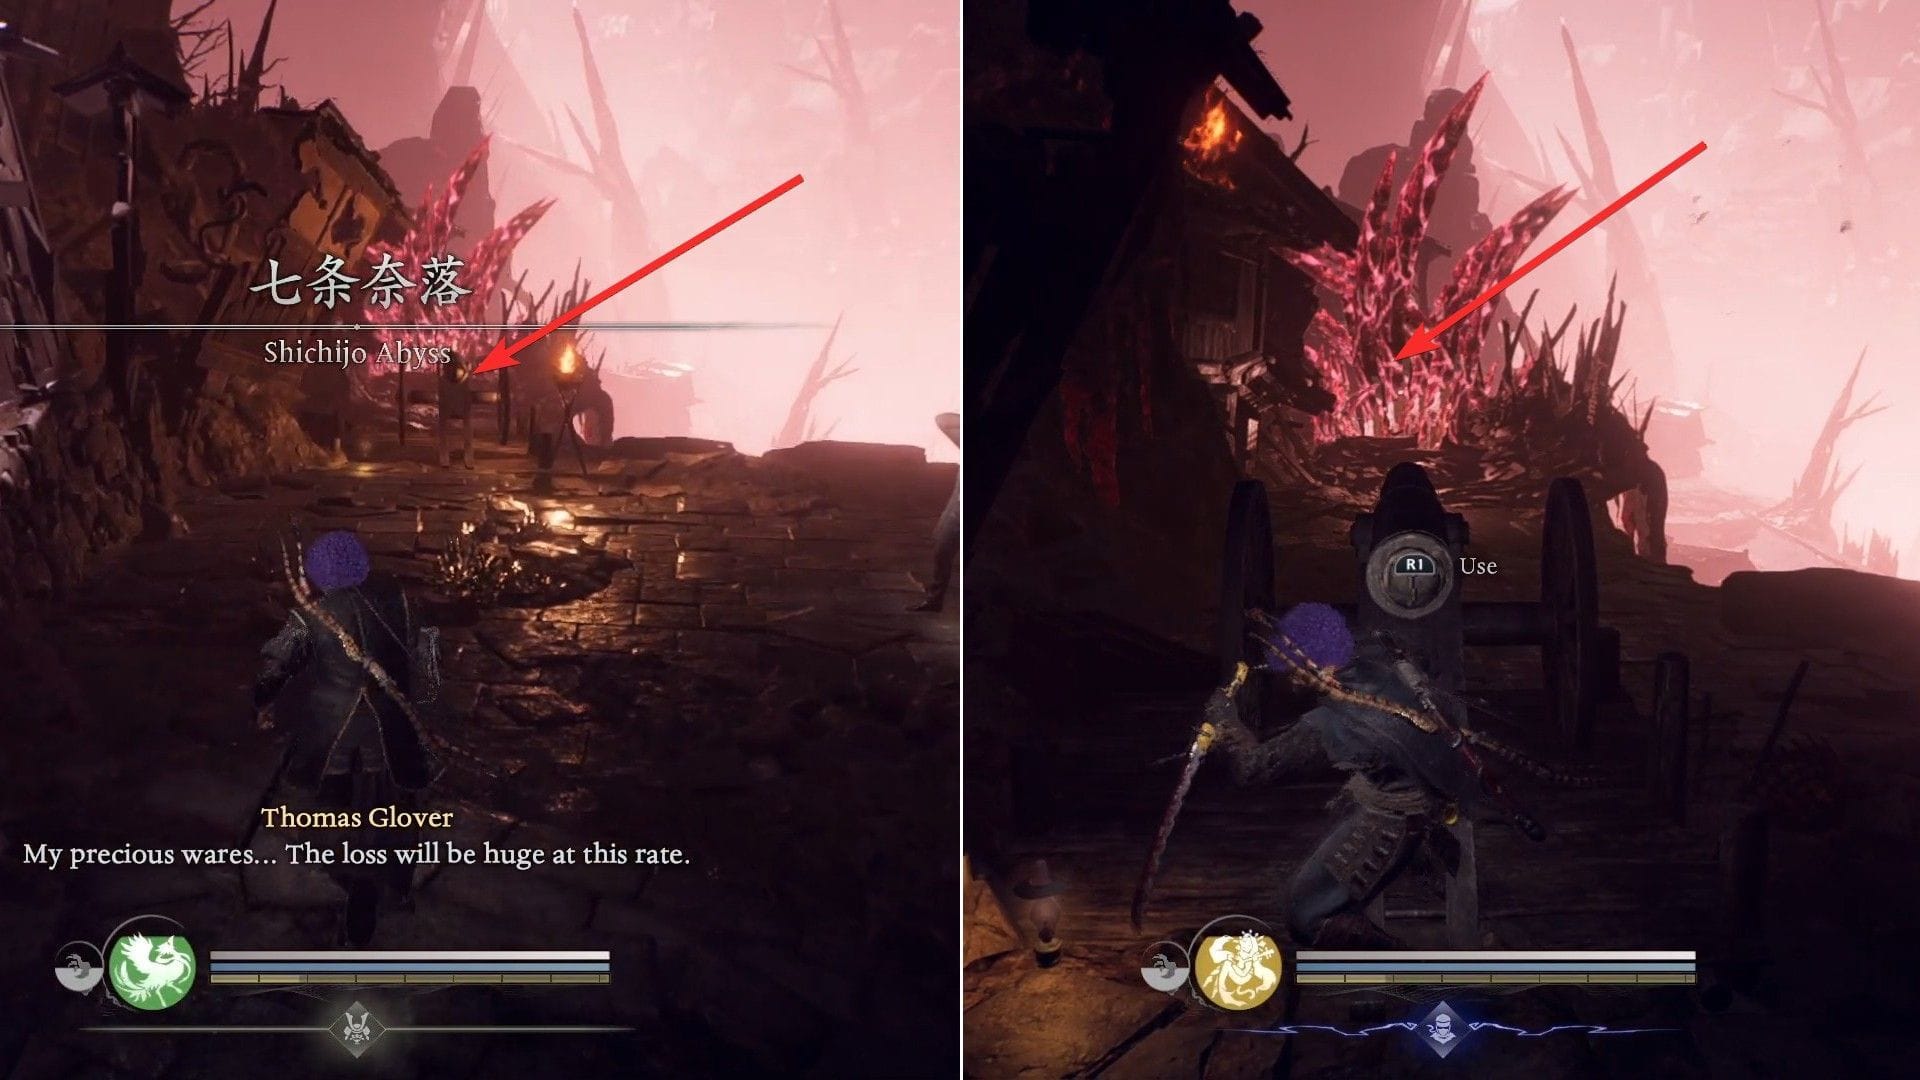
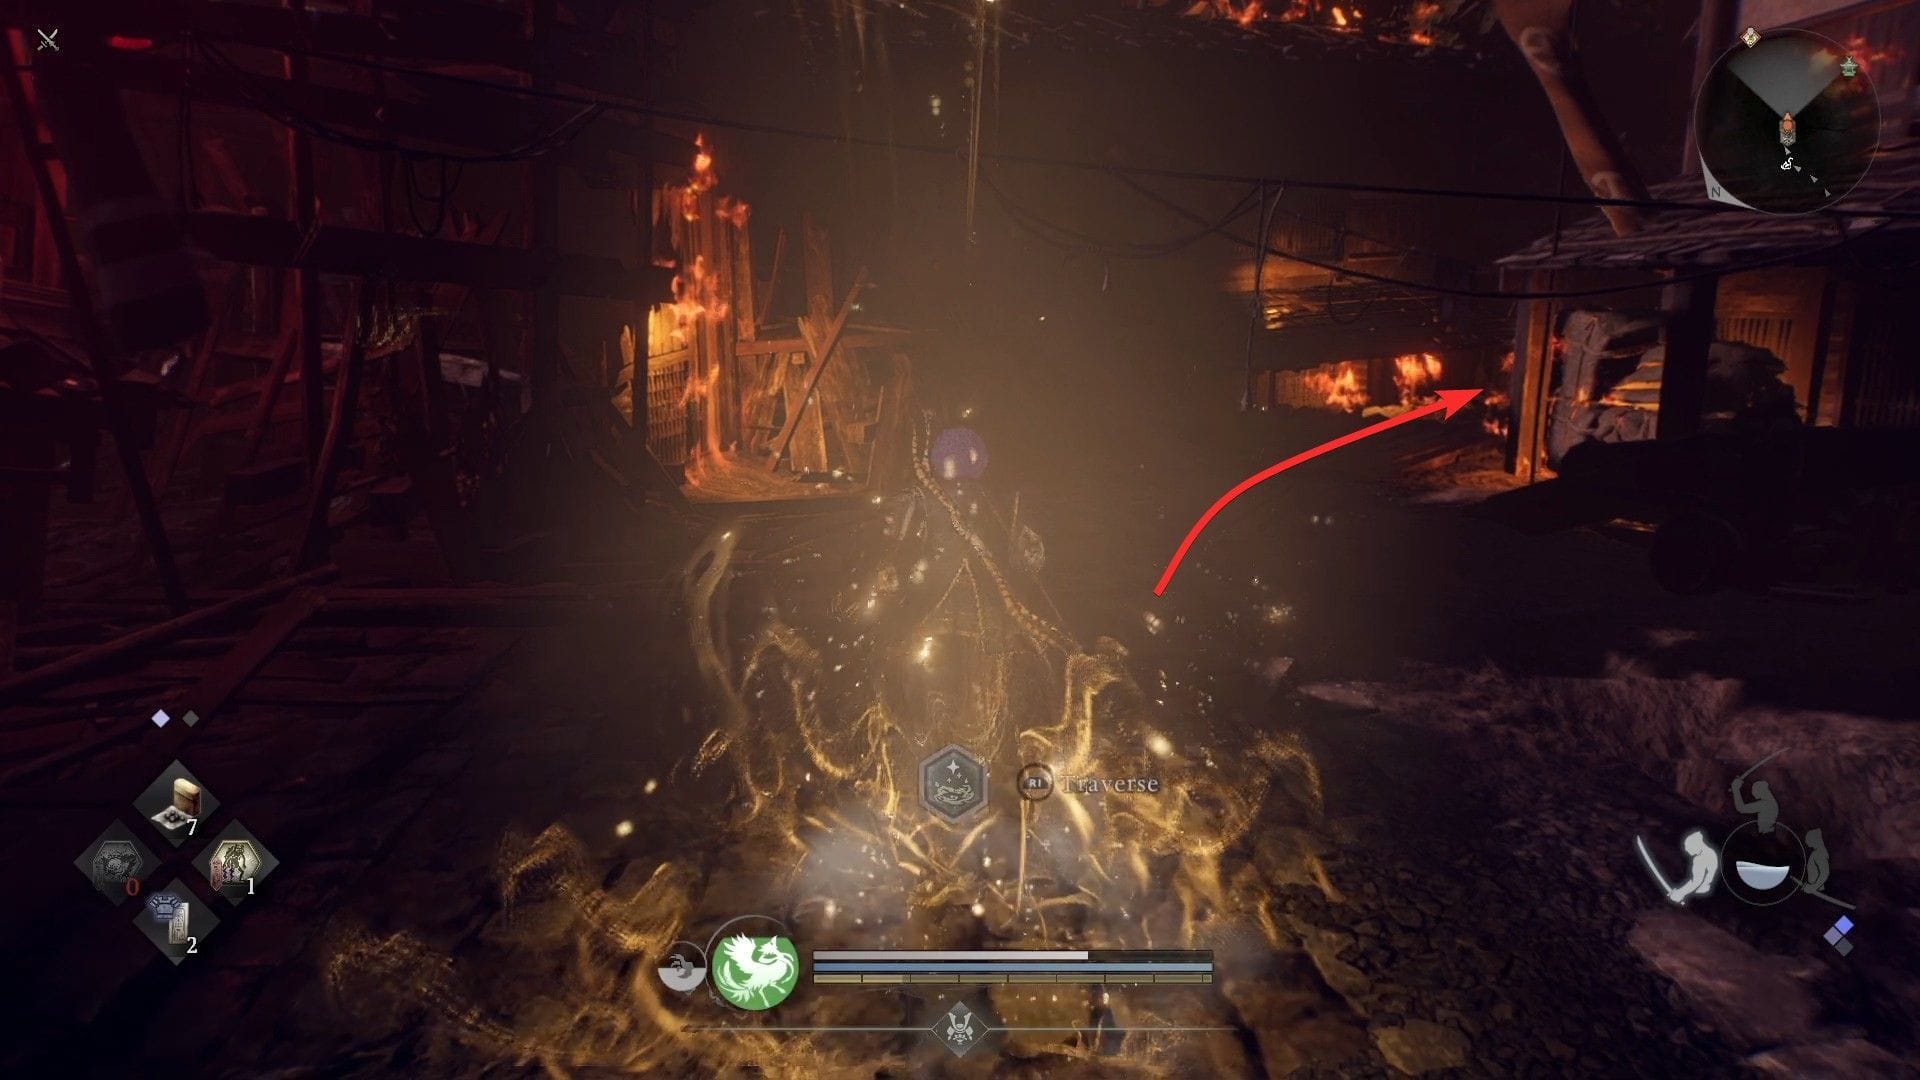
From there, Head east and Break down barriers with Canon Front.
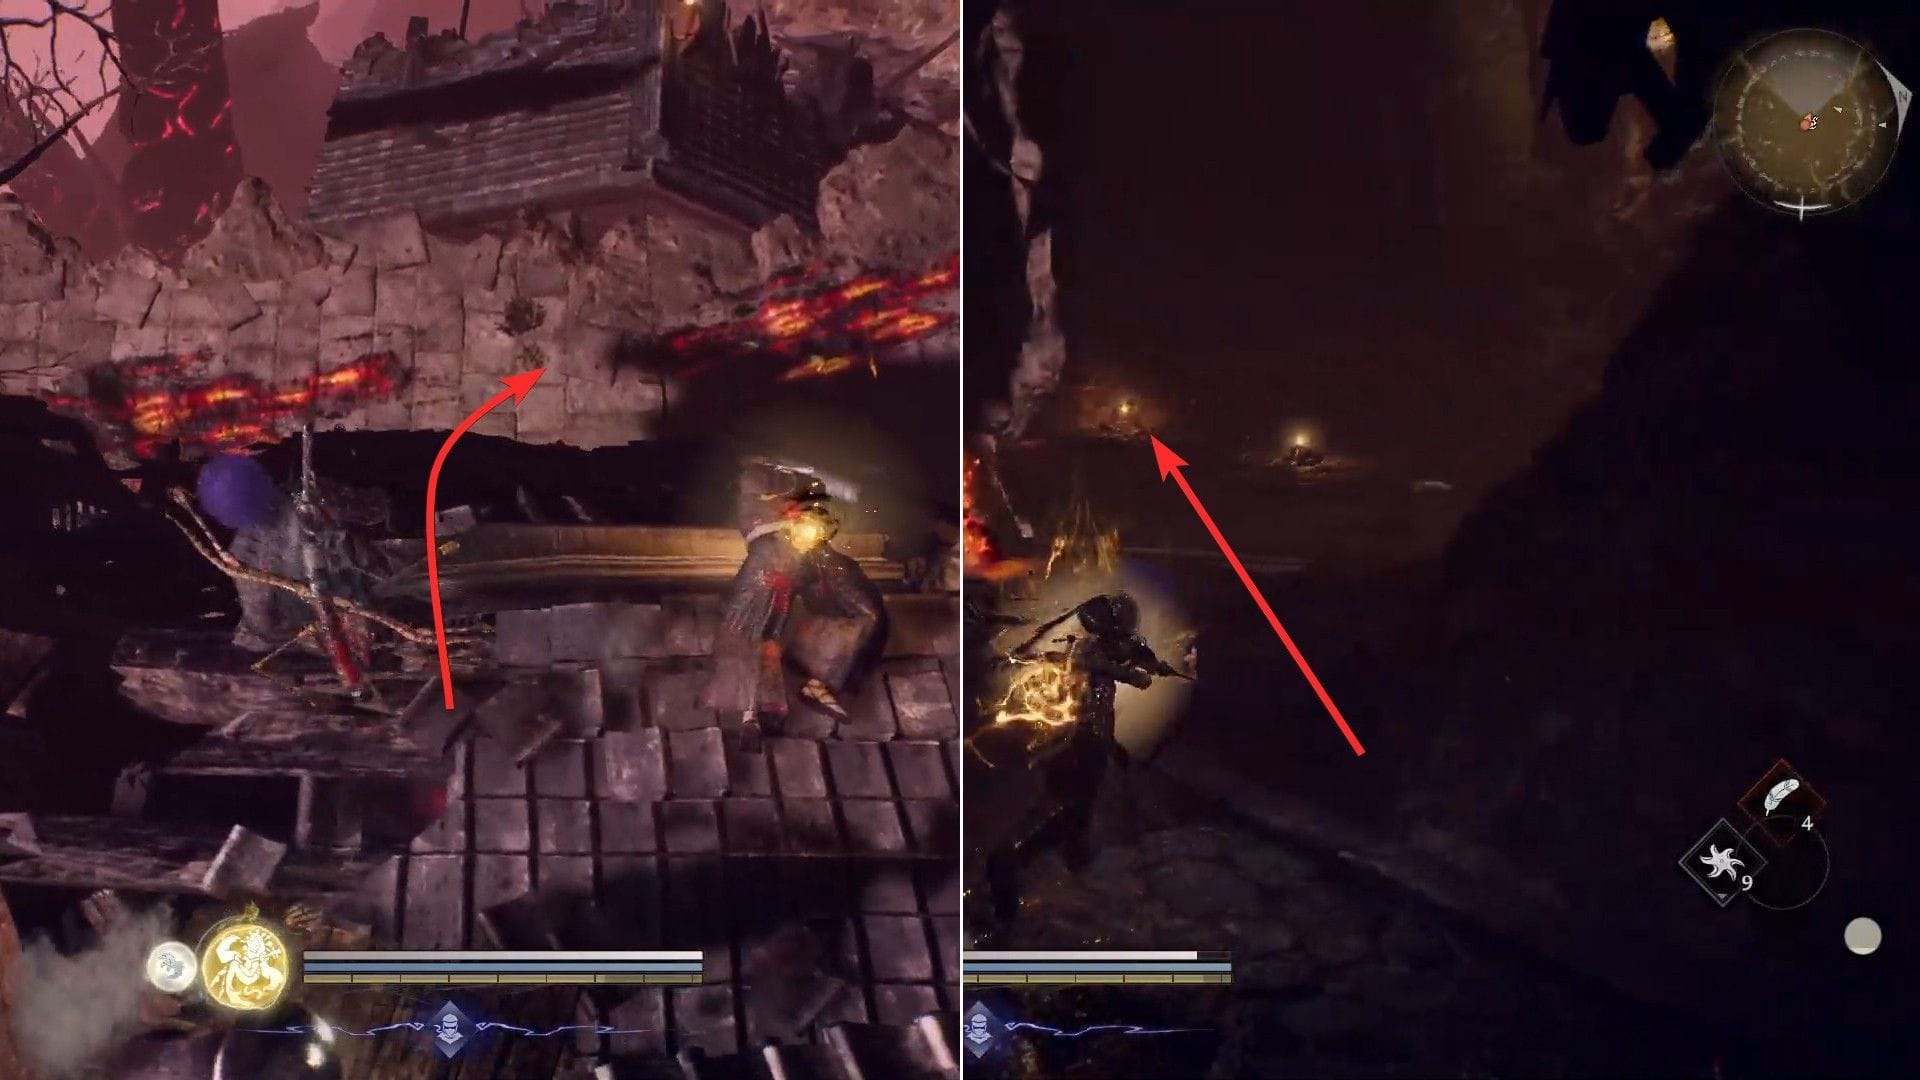
then move on to the north and Enter the house on the left through the opening. Continue heading northeast Reach an open area full of enemies.
After clearing the area, take the narrow path Go downhill to the southwest. fell from the roof to the ground.
Defeat the attacker()
at last, Enter the cave and Interact with the body in the corner Trigger some dialogue. After a while, the boss battle with Saito Kazuo will begin. Use Guardian Spirit skills and Soul Cores to overwhelm him.
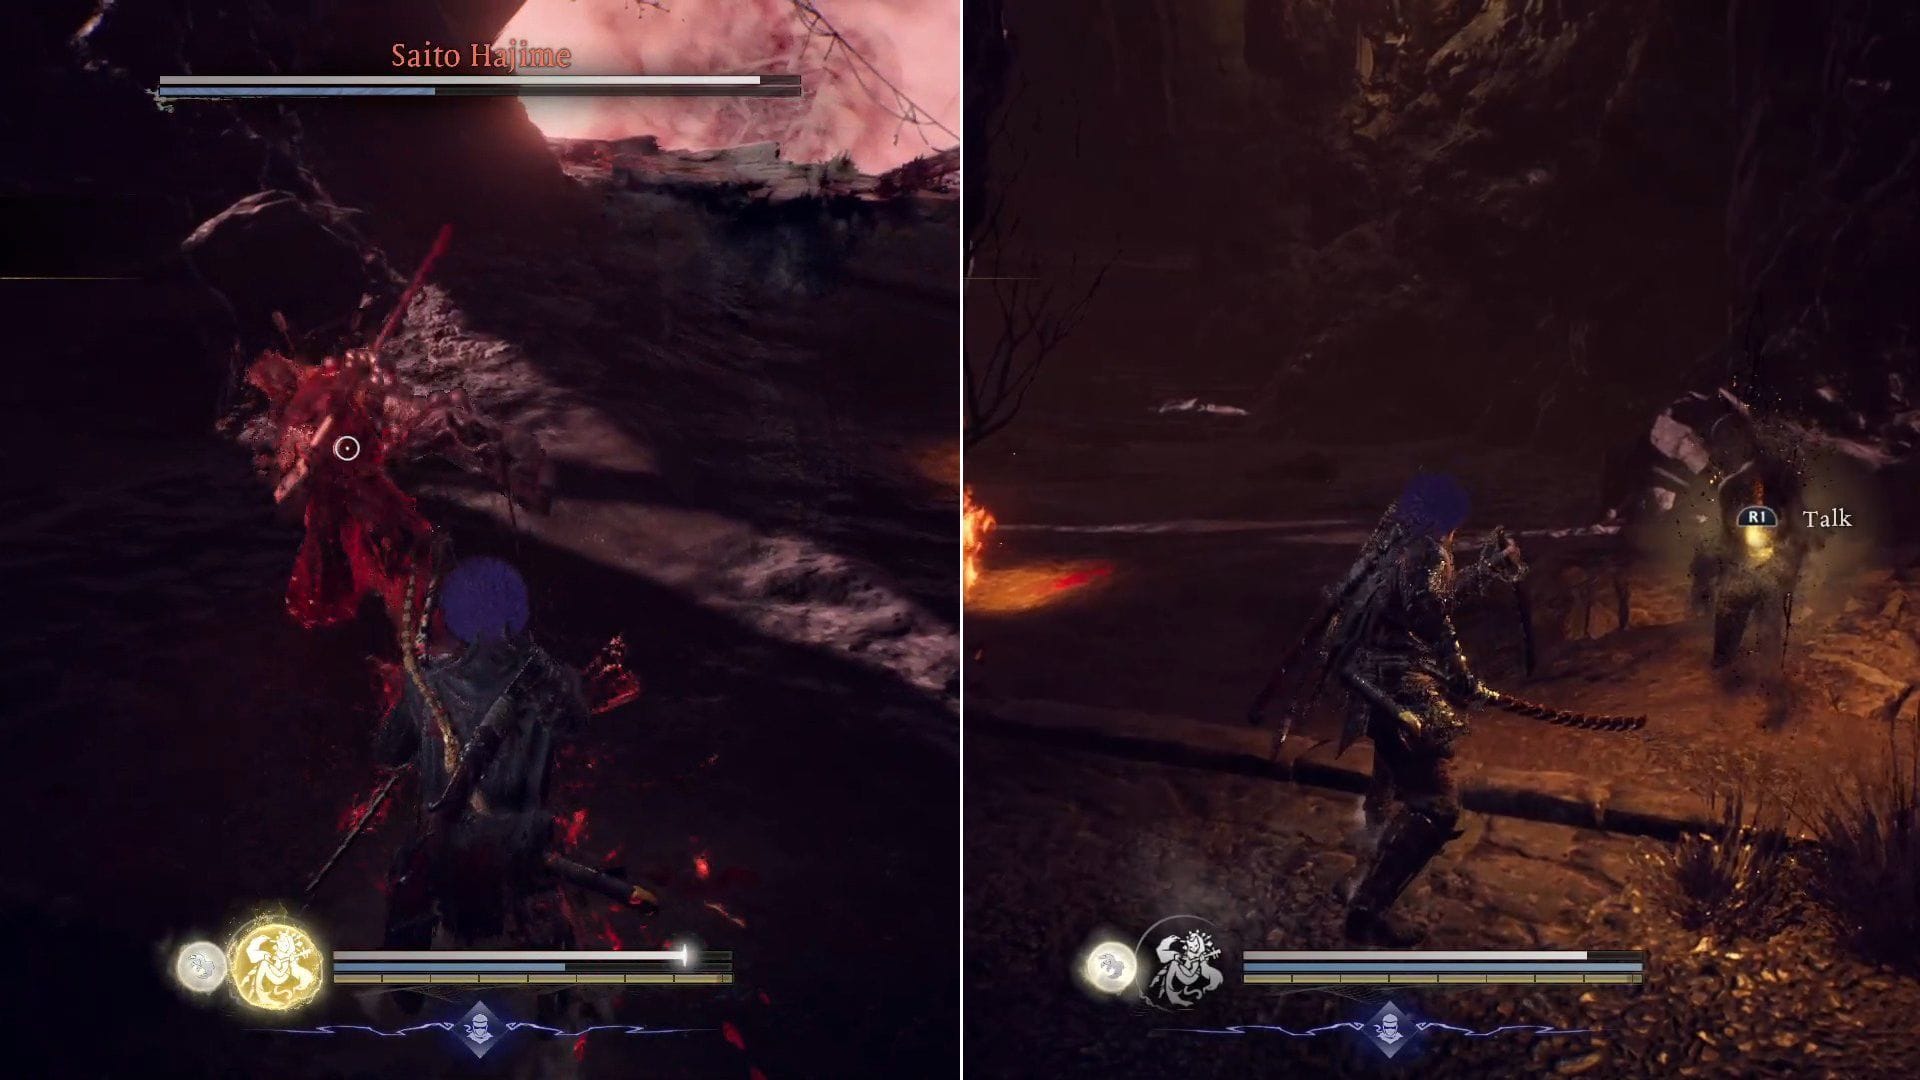
After defeating Saito Ichi, collect water drops and then Talk to nearby quest giver For completing the Shinsengumi Project side mission in “Nioh 3”, you will receive the following rewards:
- Kubizen Odachi
- Forged Text: Kijinmaru Kunishige
- Samurai Point x1
Check out more Nioh 3 themes below:
Are you stuck on Wordle today? our word solver will help you find the answer.
Edited by Debayan Saha